Vue.js Single Page Application with adal.js and PnP.js: step by step guide
Today’s task is to:
- build a single page application with vue.js and TypeScript
- enable authentication and authorization through organizational accounts using adal.js
- get some data from SharePoint site using PnP.js library
As usual, the full code is available here at GitHub.
Let’s get started!
Create a new app registration in Azure AD
To make authentication with organizational accounts work, we should add a new app registration in Azure AD. Create a new app registration. Edit manifest and set “oauth2AllowImplicitFlow”: true. This is required to make authentication in single page application work.
Also, add http://localhost:8080/ as reply url for the app registration. This is the url we use for development. For production, you should add your production urls. Take a note on Application Id (aka Client Id).
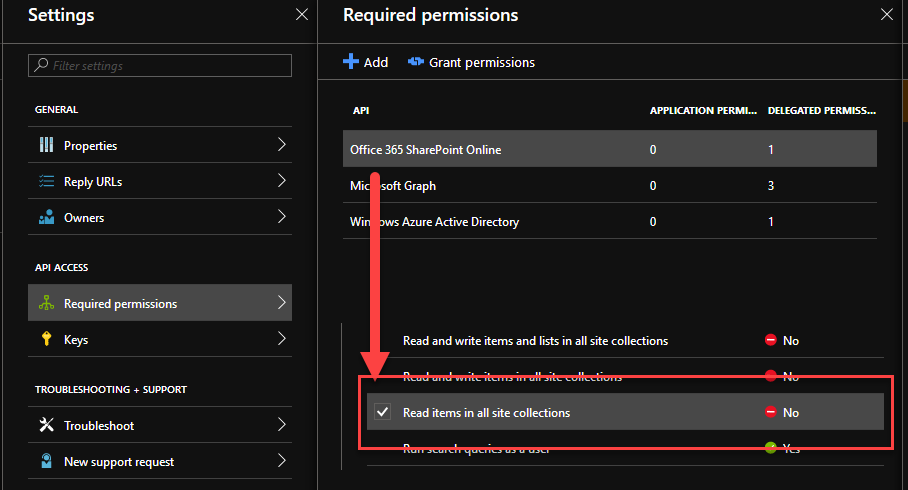
Add permissions to the newly registered app
We should provide read permissions to SharePoint. Under the app registration click on “Required permissions”, select Office 365 SharePoint Online and check “Read items in all site collections”:
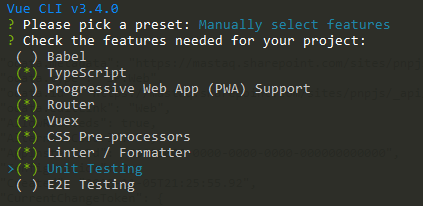
Scaffold Vue.js project
We should scaffold the project with TypeScript. Fortunately, it’s extremely easy with vue cli. Run
$ vue create my-projectSelect features manually (TypeScript, Router, css pre-processors and others). For example, my config is below:
Install dependencies
We need adal.js and PnP.js dependencies. Let’s install them:
$ npm install @pnp/odata @pnp/common @pnp/graph @pnp/sp @pnp/logging @types/adal-angular adal-angular --saveConfigure Vue.js project to support authentication with adal.js
Auth.vue
That’s the main component which handles all authentication. This component also encapsulates rendering logic and shows child content only if a user is authenticated.
Let’s create our adal config first. Create a file adalConfig.ts with below content:
import * as AuthenticationContext from 'adal-angular';

export const adalConfig: AuthenticationContext.Options = {
  tenant: 'd2a410c1-dc63-444f-99b4-1a943e8c8d1d',
  clientId: 'f75c511f-1e5a-44ef-adc1-284be802e03e',
  cacheLocation: 'localStorage',
};
You will have different clientId and tenant.
In Auth.vue, before rendering anything we should check authentication status and redirect a user to an Office 365 login page or let the user continue to browse the application.
Resulting class will look the one below:
@Component
export default class Auth extends Vue {
  public authenticated: boolean = false;
  public renewIframe: boolean = false;
  public errorMessage: string = '';
  public hasError: boolean = false;

  public beforeMount(): void {
    authContext.handleWindowCallback();

    // we are inside renew iframe, thus do nothing
    if (authContext.isCallback(window.location.hash)) {
      this.renewIframe = true;
      return;
    }

    // no user context, let's redirect to authentication page
    if (!authContext.getCachedToken(adalConfig.clientId) || !authContext.getCachedUser()) {
      authContext.login();
    } else // show error if there is an error response from Office 365
    if (authContext.getLoginError()) {
      this.hasError = true;
      this.errorMessage = authContext.getLoginError();
    } else { // user was authenticated, show child content and initialize pnp.js
      this.authenticated = true;

      // pnp.js initialization logic goes here

    }
  }
}
and template:
<div>
	<slot v-if="authenticated"></slot>
	<slot name="login-error" :errorMessage="errorMessage" v-if="hasError"></slot>
	<slot name="login-progress" v-if="!authenticated && !hasError"></slot>
</div>NOTE: I use Vue 2.6 slot syntax.
Configure PnP.js
We have adal code in place, let’s configure PnP.js. For PnP.js I use custom fetch client based on adal’s AuthenticationContext. PnP.js has in-built one, however, it uses popups and tightly coupled to the specific version of adal.js. Also, a custom fetch client gives greater control over the code. The implementation is simple and straightforward (PnPFetchClient.ts):
export class PnPFetchClient extends BearerTokenFetchClient {
  constructor(private authContext: AuthenticationContext) {
    super(null);
  }

  public fetch(url: string, options: FetchOptions = {}): Promise<Response> {
    if (!isUrlAbsolute(url)) {
      throw new Error('You must supply absolute urls to PnPFetchClient.fetch.');
    }

    return this.getToken(this.getResource(url)).then((token) => {
      this.token = token;
      return super.fetch(url, options);
    });
  }

  private getToken(resource: string): Promise<string> {
    return new Promise((resolve, reject) => {
      this.authContext.acquireToken(resource, (message, token) => {
        if (!token) {
          const err = new Error(message);
          reject(err);
        } else {
          resolve(token);
        }
      });
    });
  }

  private getResource(url: string): string {
    const parser = document.createElement('a') as HTMLAnchorElement;
    parser.href = url;
    return `${parser.protocol}//${parser.hostname}`;
  }
}
It uses adal to generate an oauth access token for any resources supported by PnP.js (SharePoint or MS Graph).
Now as we have our fetch client in place, we can update PnP.js configuration logic (Auth.vue) with below code:
  // pnp.js initialization
  const fetchClientFactory = () => {
	return new PnPFetchClient(authContext);
  };

  sp.setup({
	sp: {
	  fetchClientFactory,
	  baseUrl: process.env.VUE_APP_SP_SITE_URL,
	},
  });

  graph.setup({
	graph: {
	  fetchClientFactory,
	},
  });
process.env.VUE_APP_SP_SITE_URL is a runtime variable supplied by Vue cli build process (through webpack of course). To supply the value you should create a file .env.development and put below content:
VUE_APP_SP_SITE_URL="https://mastaq.sharepoint.com/sites/pnpjs"Update it with url to your site.
Now in your root component, you can use Auth component to enclose all other components:
<auth>
  <div id="nav">
	<router-link to="/">Home</router-link> |
	<router-link to="/about">About</router-link>
  </div>
  <router-view/>

  <template #login-error="{errorMessage}">
	<login-error :errorMessage="errorMessage"></login-error>
  </template>

  <template #login-progress>
	<div>Initializing...</div>
  </template>
</auth>
This template has two slots to provide custom content for errors (login-error) and when the login is in progress.
We’re almost done!
Use PnP.js from your Vue components
You have two options here. One option is to create a plugin, which will supply PnP.js instance in all your Vue instances. Actually, I created this plugin for you - vue-pnpjs.
The usage is extremely simple, in your main.ts file insert below code to configure Vue with PnP.js:
import VuePnP from 'vue-pnpjs';
import { sp } from '@pnp/sp';

Vue.use(VuePnP, {
  sp
});
That’s it! Now in your component simply write:
Alternatively, you can create a separate class and simply import it in your component.
For your convenience the source code is here at GitHub. You can configure it and run locally.