SPFx webpart with MS Graph and PnPjs: step by step guide
So you want to build an SPFx webpart which uses MS Graph API through PnPjs. Here is step by step guide on how to do that.
A few months ago I wrote a similar post, however, things were changed, some things were simplified a lot, that’s why this is a revisited guide. Also, I’ve addressed some additional steps here. The source code is available on the official SharePoint/sp-dev-fx-webparts GitHub repository.
Prerequisites
- SPFx >= 1.6
- PnPjs >= 1.2.4
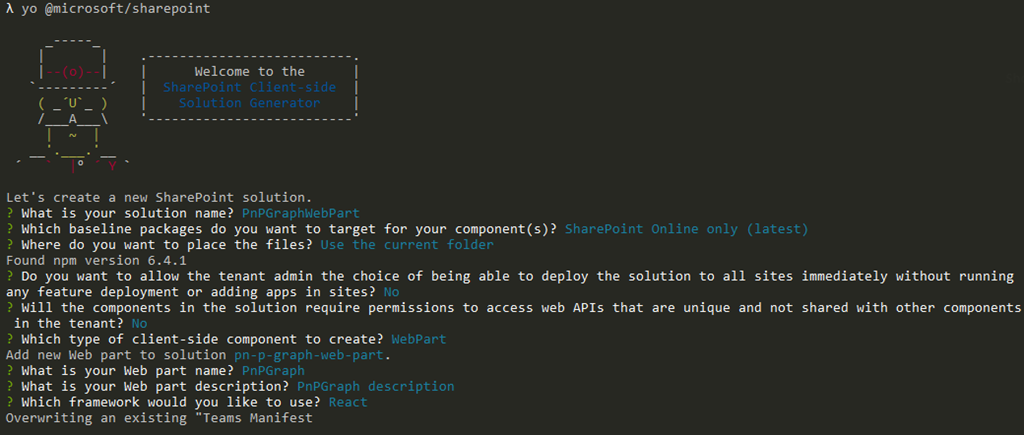
1. Scaffold SPFx webpart solution with React
This step is pretty self-explanatory, simply run yo @microsoft/sharepoint, select React, give your webpart a name, do not change other defaults asked by yeoman.
2. Install PnPjs dependencies
Run
npm install @pnp/common @pnp/odata @pnp/logging @pnp/graph @microsoft/microsoft-graph-types --saveto install all required PnPjs dependencies and @microsoft/microsoft-graph-types which contains useful type definitions for MS Graph types. You can also use –save-exact flag to persist specific versions and prevent automatic update to the most recent ones.
3. Configure PnPjs instance
This step is required for all PnPjs related solutions. You should configure PnPjs to make it aware of your environment and \ or application. In the case of an SPFx solution, the configuration part is very simple and straightforward.
Open your webpart and import setup method:
import { setup as pnpSetup } from '@pnp/common';Add onInit and configure spfxContext with an instance of web part’s context:
public onInit(): Promise<void> {
	pnpSetup({
	  spfxContext: this.context
	});
	return Promise.resolve();
}
The code looks simple, however, a lot of things will happen at runtime later on.
If we open PnPjs source code, graphlibconfig.ts, we will see that under fetchClientFactory getter there is a check for spfxContext property:
public get fetchClientFactory(): () => HttpClientImpl {

	const graphPart = RuntimeConfig.get("graph");
	// use a configured factory firt
	if (graphPart !== undefined && graphPart !== null && graphPart.fetchClientFactory !== undefined) {
		return graphPart.fetchClientFactory;
	}

	// then try and use spfx context if available
	if (RuntimeConfig.spfxContext !== undefined) {
		return () => AdalClient.fromSPFxContext(RuntimeConfig.spfxContext);
	}

	throw Error("There is no Graph Client available, either set one using configuraiton or provide a valid SPFx Context using setup.");
}
If the property is initialized, then fetchClientFactory will be initialized with a method, which returns an instance of SPFxAdalClient class.
fetchClientFactory returns an instance of a class, which implements fetch method. Fetch method simply sends http request, however it also can adjust ongoing http request or modify http headers or add authorization. In turn, SPFxAdalClient’s fetch method adds OAuth bearer access token to ongoing http request to make it authenticated against MS Graph endpoint.
If we inspect getToken method (inside SPFxAdalClient class):
public getToken(resource: string): Promise<string> {
	return this.context.aadTokenProviderFactory.getTokenProvider().then(provider => {
		return provider.getToken(resource);
	});
}
we will see that it uses SPFx feature called AadTokenProvider (first introduced in SPFx 1.6). It turned out that PnPjs uses some SPFx features for access token generation. What does it mean for us? It means that we should configure web API permissions for our webpart accordingly because that’s the part of SPFx Web API permissions infrastructure used by PnPjs.
4. Add permission requests to the webpart
Open ./config/package-solution.json and add permission requests:
"webApiPermissionRequests": [
  {
	"resource": "Microsoft Graph",
	"scope": "Group.Read.All"
  }
]
In my sample, I’m going to use Groups API. In your webpart, you should add as many permission requests as your app needs.
5. Package your app
Run
gulp bundle --ship
gulp pacakge-solution --ship
to package your app.
6. Upload the app to your app catalog
Locate your package at ./sharepoint/solution/your-app.sppkg. Upload that package to the app catalog. Upon uploading you will see below screen:
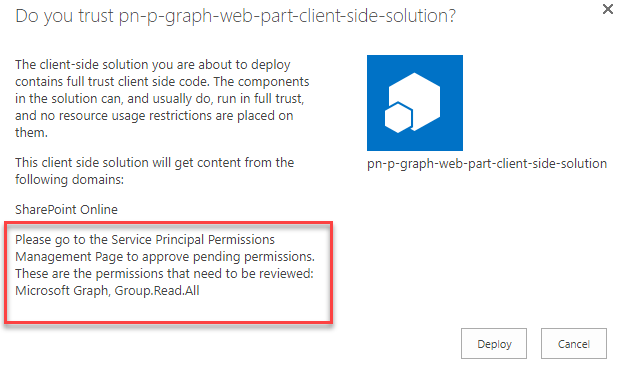
The message seems complicated, but what it means is that you should approve all permission requests which we added earlier.
7. Approve app permission requests
There are different ways to approve your permission requests (UI, PowerShell, o365 cli). The most simple one is through the new UI of SharePoint central administration. You can navigate to your old SharePoint admin center and click “Try new” UI from there. Or you can simply open a page https://
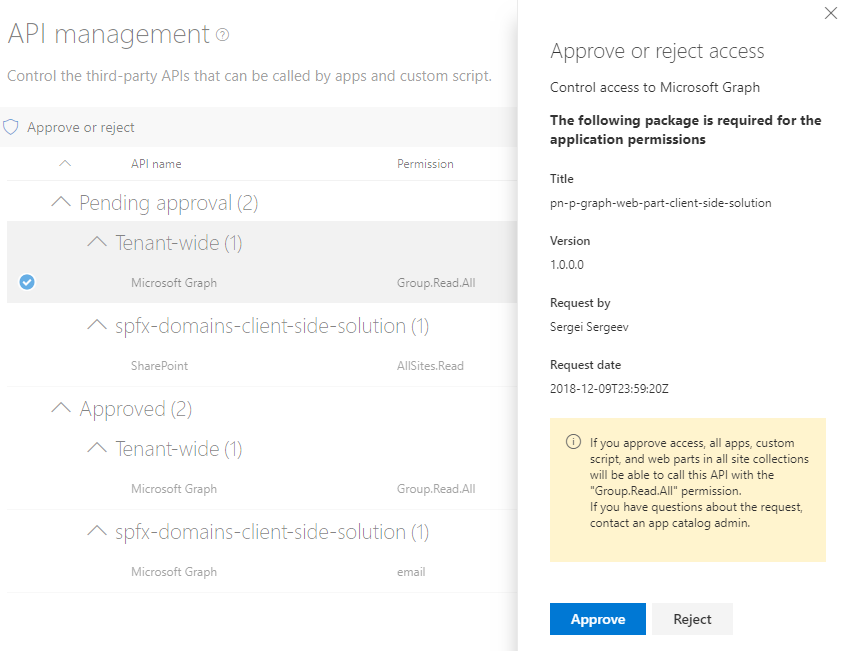
Go ahead and select your APIs and click Approve. Please note, that if you use this feature at your tenant for the first time, you might experience some issues. Sometimes it simply happens. I did a post on issues I had. There is a post by Waldek as well on a different set of issues you might see. If you see errors try to look for a solution in mentioned posts.
Now we’re ready with configuration part and can finally program our webpart code.
8. Write code!
In my sample, I use Groups API to get all groups and display in a list. The code which gets the data is fairly simple:
graph.groups.get<Group[]>().then(groups => {
  this.setState({
	groups
  });
});
When ready, simply run gulp serve and open hosted workbench (it only works in hosted one) to see it in action.
Once again, the sources you will find on the official SharePoint/sp-dev-fx-webparts GitHub repository.